Wednesday, March 31, 2010

Colonial Day Corn Pancakes

 
We are celebrating Colonial Day at our school today.  Yours truly is in charge of making corn pancakes.  I am going to talk to the kids about the ways corn was used and how they ground the corn to make flour, meal, and grits.  Fun!
I looked at a few recipes for pancakes and then came up with my own.  It is fantastic --well, my family thinks so...  It couldn't be easier and I know I will use it for breakfast, lunch, and dinner!  It would be great at breakfast time with a fried egg.  It would be great at lunch with a side salad.  It would be a lovely little appetizer with some creme fraiche and smoked salmon.  I also think it will be great with black beans and avocado.  I would prefer to use fresh corn in this recipe but none is available right now.  The frozen corn worked very well in the place of fresh. 

Colonial Day Corn Pancakes
3/4 cup corn flour (this is not cornmeal it is much finer --I used Bob's Red Mill brand)
1/2 cup corn grits (I also like Bob's Red Mill brand for grits)
1/2 teaspoon kosher salt
2 teaspoons baking powder
2 large eggs
1 cup milk  (I might try this with buttermilk --would be great I am sure)
2 Tablespoons unsalted butter, melted
1/2 cup of corn kernels (fresh preferred but frozen will do)

Put about a teaspoon of butter in your pan or wipe the griddle with oil (do this before heating!).  Heat non-stick or cast iron griddle or fry pan on medium heat. In a small bowl, use a fork to mix the corn flour, corn grits, salt, and baking powder together and set aside.  In a large bowl whisk together (you can just use a large fork for this) eggs, milk and melted butter.  Add the dry ingredients and stir together --batter will be loose not thick.  Depending on the size of pancake you want --about 1/8 cup to 1/4 for large pancakes --drop batter onto hot pan or griddle.  Add a few corn kernels to the top of each pancake on griddle.  Cook for about 2-3 minutes until bubbles form on surface.  Using a spatula to flip pancakes to the other side and allow to cook for another couple minutes.  Enjoy!!

Tuesday, March 30, 2010

Claire's Chicken Broth Challenge!

Yes, just one more thing about this Chicken Broth.  Fitzy and Tricia were giving me a hard time when I posted my Chicken Stock recipe a while back.  They saw me at carpool time that day and were teasing me, "oh, of course you don't buy your chicken broth, how could we even think it!  No, you make your own! "  These are two of the funniest ladies ever (they make me laugh like nobody else) but I realize this quote may not seem funny to you.  Believe me, they made it very funny.  At my expense, of course.

Well, funny ladies.  And everyone else.  I challenge you to make this chicken broth.  It is so incredibly easy and it makes quite a lot (10 cups plus).  Not to mention the wonderful poached chicken that you also get from the recipe.  Store the broth in 1-cup or 2-cup portions in freezer proof ziploc-type bags in your freezer.  You will feel so wonderful when you pull one of those bags out of the freezer --use them to cook rice, make a little chicken noodle soup (just heat up the broth and add your favorite noodles), add some to your next pot roast, etc.  Now, go do it and let me know about it!! xoxo

Sunday, March 28, 2010

Passover Chicken Broth


Heart be still.  Like I said, I am in love!  This is the Leek-Parsley Matzoh Balls in Passover Chicken Broth.  I really must insist that you make this for your family.  The recipe for this chicken broth was very very easy.  Remember my Chicken Stock --that was a much stronger taste because the chicken wings are roasted so it produces a darker colored broth.  This broth was clear and had a pure chicken taste.  Perfect to showcase the matzoh balls.

Here is the recipe as shown in The Washington Post.  I didn't have any celery so I left that out and I added some parsnips.  I love parsnips!

Passover Chicken Broth
adapted from a recipe in The Washington Post, March 24, 2010


NOTE:  Soaking the chicken in a brine solution reduces or eliminates cloudiness.


MAKE AHEAD: The broth can be refrigerated for 3 days in advance, or frozen flat in gallon-size heavy-duty resealable plastic food storage bags for up to 6 months. Reheat over medium-low heat until warmed through; do not boil.  Makes about 10 cups


1/2 to 3/4 cup kosher salt (for soaking), plus more to taste
1 large roasting chicken, cut into 12 pieces (5 to 6 pounds, excluding gizzards, heart, liver, etc.)
3 medium carrots, trimmed and peeled
2 medium onions, cut into quarters
2-3 small parsnips, trimmed and peeled
1 teaspoon whole black peppercorns
12 cups cool water, or as needed

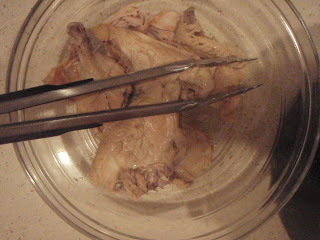
Fill 1 or 2 large bowls with cool water, then add the salt (as needed) and swish to dissolve. Add the chicken pieces and soak for 20 minutes, then discard the soaking liquid.
Meanwhile, combine the carrots, onions, parsnips and peppercorns in a large soup pot. Add the chicken and then the water, making sure the chicken is covered by several inches (if not, add water as needed). Bring almost to a boil over high heat, then reduce the heat to medium-low, cover and cook for about 5 hours, adding water as needed to maintain the initial level of liquid.
Remove large pieces of poached chicken meat and bone, reserving the cooked chicken for another use. Discard the bones, skin and any vegetable solids.
Line a fine-mesh strainer with a few layers of cheesecloth. Strain the broth into a clean soup pot (for finishing matzoh balls), or cool to room temperature, then transfer to containers for storage in the refrigerator or freezer.
Taste, and season with salt as needed before serving. Serve with a sprinkling of chopped parsley.

Recipe Source:
Adapted from a recipe by John Torode in "Chicken and Other Fowl" (Firefly, 2010).

Saturday, March 27, 2010

Leek-Parsley Matzoh Balls

 
Um, I think you should know something.  I am in love. (sigh) Yes, in love with these matzoh balls!!  You must make these and the Passover Chicken Broth that I will be posting tomorrow.  Together they are THE BEST MATZOH BALL SOUP EVER!!!  I must admit that I did use butter in this recipe.  I'm a Catholic gal so I'm not worried about keeping this dish Kosher.  I would bet these matzoh balls will taste just as good without the butter.  These are light, airy, creamy, yummy comfort food at its best.  So very easy to make but there is some waiting time in between steps.  Good things come to those who wait!

Here is the original recipe from The Washington Post.  I substituted butter for margarine and left out the chives.  So delicious!

Leek-Parsley Matzoh Balls

adapted from a recipe in The Washington Post, March 24, 2010

MAKE AHEAD: The matzoh ball mixture needs to rest in the refrigerator for at least 2 hours and up to 1 day; uncooked balls need to rest for 30 minutes in the fridge before they are cooked. The cooked matzoh balls can be refrigerated in or out of liquid up to 3 days in advance. Reheat in your favorite broth, over low heat, until warmed through.
Makes 14 to 16 medium-size balls or about 30 small balls

6 tablespoons unsalted butter
1 medium leek, white and light-green parts only, cleaned, then finely chopped (1/2 cup)
Large handful of flat-leaf parsley leaves, finely chopped (1/2 cup)
4 large eggs
1 1/4 cups plain matzoh meal, preferably Streit's
1/2 cup plain club soda or plain seltzer water
1/2 to 1 teaspoon salt
1/4 teaspoon freshly ground black pepper

Melt the margarine or butter substitute in a small skillet over medium heat. Add the leek and cook for 5 minutes, until softened. Remove from the heat; add the parsley.
Beat the eggs in the bowl of a stand mixer or hand-held electric mixer on medium speed for about 2 minutes, until frothy.
Stir in the leek-parsley mixture. Gradually add the matzoh meal, then stir in the club soda and mix well; the consistency should be like that of corn muffin batter. Add salt to taste and the pepper. Cover with plastic wrap and refrigerate for at least 2 hours and up to 1 day.
Line a baking sheet with plastic wrap. Wet the palms of your hands and form either 14 to 16 medium balls or 30 small balls (small ones will be a generous teaspoon). Do not compress; work your fingers gingerly around the ball in shaping it as round and smooth as possible. Place the completed balls on the baking sheet as you work. Cover loosely with plastic wrap and refrigerate for 30 minutes.
Meanwhile, bring a large pot of salted water to a boil over high heat. Working in batches as needed (no more than 10 to a very large pot), drop the balls into the water; reduce the heat to medium, partially cover and cook for 40 to 60 minutes, until the balls are tender. Transfer the cooked matzoh balls to a bowl and cover loosely to keep warm while you cook the remaining matzoh balls. Add to your favorite warm broth, or cool and refrigerate as directed above.


Friday, March 26, 2010

My favorite all-purpose pot

My Favorite All-Purpose Pot
This is my All-Clad 6-quart, stainless steel, all-purpose pot.  I know these are expensive but this pot can do everything and it lasts forever.  It works on top of the stove for soups, sauces, pasta, and more.  It works well in the oven for pot roast, brisket, and chicken.  I have had mine for over 20 years.  My friend Suzy wanted to make the Sweet & Sour Pot Roast but she figured she needed the enameled cast iron pan by Le Crueset because this is what I showed in my pictures.  When I am making brisket or pot roast I do use my Le Creuset but just as frequently I use my All-Clad.  Really, any heavy bottom pan that has a lid will do.   Suzy actually had this exact pot but she didn't realize it could be used in the oven--I started asking around and found out that many others also didn't realize this pot could go in the oven.  Suzy's husband was glad to know that there was no need to purchase a new pot.  (Hmmmm...This is exactly how my husband would react to that kind of news!)


Thursday, March 25, 2010

Pasta Primavera

 
This is just one of my "throw-together" meals.  I saw some beautiful organic zucchini at the grocery yesterday morning so I knew right then what I would be making for dinner.  This dish just screams "Spring" to me.  I am one of those people that loves eggplant, I never met one I didn't like.  If you don't love it like I do then just leave it out.  You could add sliced carrots, mushrooms, asparagus.....whatever you want!

Pasta Primavera

1-2 small zucchini, sliced in half and cut into cubes
1 small to medium onion, peeled, halved, and sliced thin
1 small eggplant, cut into small cubes
1/4 pint of cherry or grape tomatoes, halved
(other addtions could include:  yellow squash, asparagus, mushrooms, carrots, etc.)
2-4 Tablespoons olive oil
1 pound pasta (spaghetti, linguini, ...whatever you like) cooked as per package instructions
4-6 basil leaves, chiffonade or just torn into pieces
freshly grated Parmigiano Reggiano to taste
kosher salt and freshly ground pepper to taste

Cook pasta in salted, boiling water while you cook the other ingredients.  Heat 1 Tablespoon oil in a large frying pan or saute' pan.  Saute' onion for about 5 minutes until they begin to caramelize and turn golden brown.  Add a couple more tablespoon oil and add eggplant and about a teaspoon of salt --saute for another 5-7 minutes until eggplant is softened and caramelized a little.  Add the zucchini and tomatoes and saute for only a couple more minutes.  The zucchini should still be crisp-tender.  Taste to see how much seasoning is needed and add salt and pepper to taste.  Toss all the vegetables in a large bowl with pasta.  Add basil and Parmigiano Reggiano --as much as you like!


The eggplant should really be cut half as small --they will caramelize faster.  Also, you don't need to use as much as I did --I just really love eggplant.  You could also peel it if you don't like the skin --I prefer the skin on.


Tuesday, March 23, 2010

Broccoli & Bow Ties

I did not forget about you!  I was at school most of the day so no time to post to the blog.  We had a VIP luncheon at school and the above was the lunch I prepared for 2 very special people.  Sarah and Elyse you were so sweet to come to the luncheon --we love you very much! xoxox

Broccoli & Bow Ties
Barefoot Contessa Family Style, 2002, page 205.

Claire’s adaptations:

• I have used asparagus or peas in place of the broccoli.
• I use a little less than 2 teaspoons of salt.
• I have made with and without the nuts and cheese – tastes great either way.

Kosher Salt
8 cups broccoli Florets (about 4 heads)
½ pound farfalle (bow tie) pasta
2 tablespoons unsalted butter
2 tablespoons good olive oil
1 teaspoon minced garlic
Zest of 1 lemon
½ teaspoon freshly ground black pepper
1 tablespoon freshly squeezed lemon juice (this is usually the juice of half a lemon)
¼ cup toasted pignoli (pine) nuts
Freshly grated parmesan cheese, optional

Cook the broccoli for 3 minutes in a large pot of boiling salted water. Remove the broccoli from the water with a slotted spoon or sieve. Place in a large bowl and set aside.
In same water, cook the bow-tie pasta according to the package directions, about 12 minutes. Drain well and add to the broccoli.

Meanwhile, in a small saute’ pan, heat the butter and oil and cook the garlic and lemon zest over medium-low heat for 1 minute. Off the heat, add scant (a little less than) 2 teaspoons salt, the pepper, and lemon juice and pour this over the broccoli and pasta. Toss well. Season to taste, sprinkle with pignolis and cheese, if using and serve.

To toast pignolis, place them in a dry saute’ pan over medium-low heat and cook, tossing often, for about 5 minutes, until light brown.